
The proliferation of mosses, climbing vegetation, porous, or frost-broken tiles… The return of sunny days is an ideal period to restore order to the roof. If you need anything regarding your house roof click here.
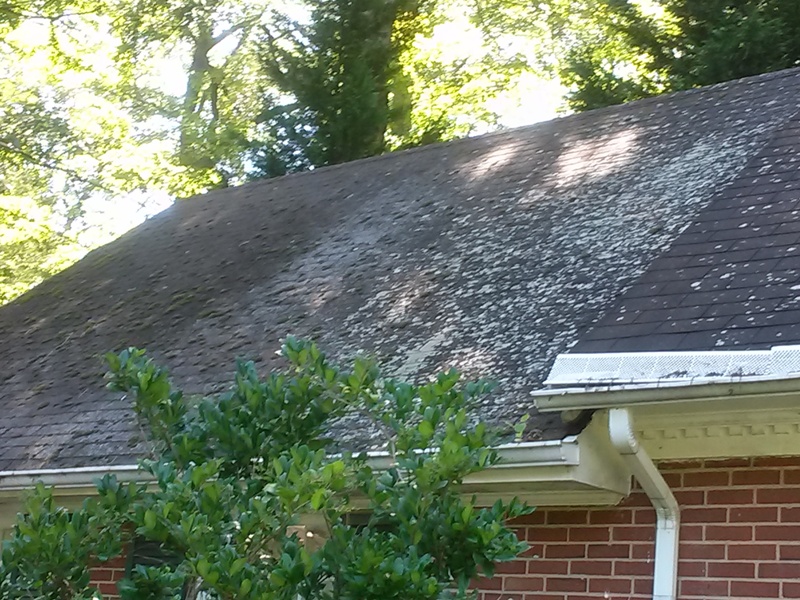
Mosses and other plants
Fixed on the roofing elements, the foams impede the flow of rainwater and promote infiltration between the tiles. If you do not want to multiply the treatments, it is better to start with a partial scraping of large particles. Peel off the foam with a scraper or any other equivalent instrument (a small cat-tongue trowel, for example). Take care not to rub too hard, so as not to scratch the tiles.
After this necessary stripping, a good rinsing is essential. Directed in the direction of the slope, the jet will remove loose particles. This cleaning must be accompanied by an anti-foam treatment to be sprayed in dry weather and preferably in the absence of wind (Dip, Julien, Robson, Sika, etc.). It exists in a ready-to-use or diluted formulation. Its selective action avoids destroying any surrounding vegetation (this type of product does not destroy root crops).
Then let time do its work. The antifoam will dry out the remnants of moss, which will naturally be eliminated by the runoff of the rain. Two or three weeks after the treatment, you can pass the pressure washer. Attention: work in the direction of the slope to avoid infiltration under the roofing elements. Once the tiles are completely dry, apply a sealant that will extend their life. Pressure washing Portland can help you to smooth the whole washing process for you.
Scrape the tiles
Even if the treatment products are useful, it is recommended to scrape as much as possible before the anti-foam treatment. An old coating knife or a small trowel will do the trick.
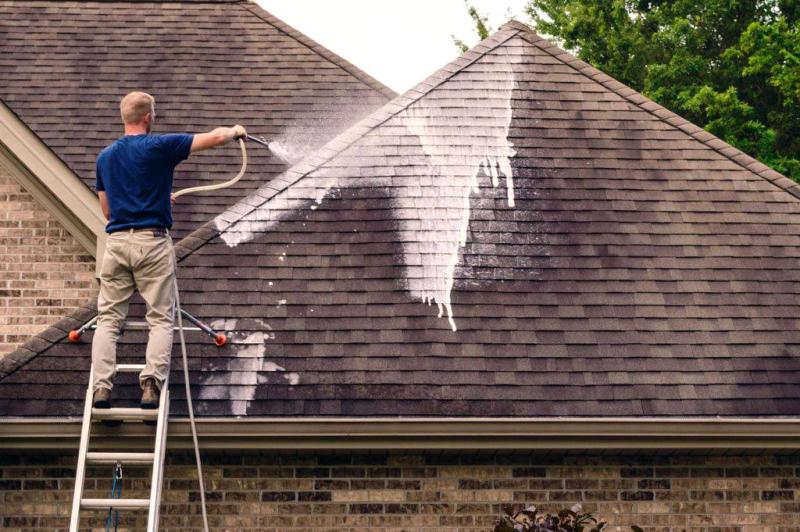
Apply an anti-foam product
The spraying of an antifoam product can be done with a garden sprayer (and a lance extension) or, as here, directly with the can connect to the garden hose.
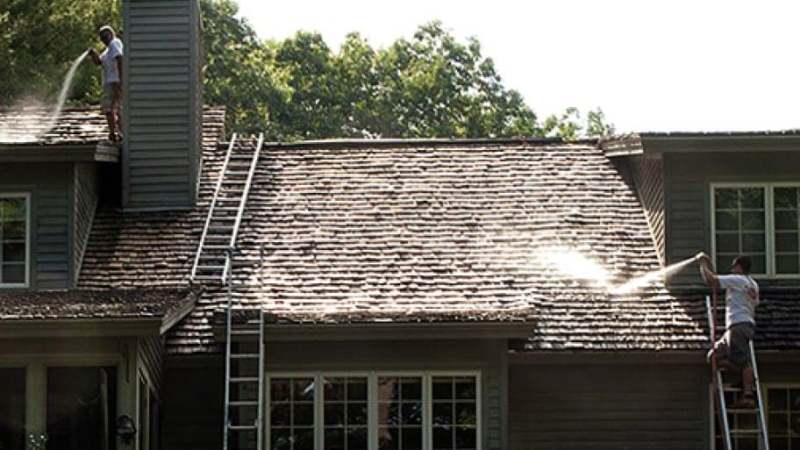
High-pressure cleaning
High-pressure cleaning (lance down) can give the roof its original shine but beware of its aggressiveness. Also, pay attention to safety: work on a well-secured roof ladder and wear a harness.
Clean the valleys
The valleys * closed with metal coquets (bent pieces) between each row of tiles remain watertight even if the junction of the slopes is congested (plant waste, moss, etc.). But sometimes the function is satisfied with a narrow zinc channel. The proliferation of mosses then leads to numerous infiltrations, which can cause severe damage. If thorough cleaning is required, the only solution to guarantee a flawless seal is to rework the junction of the two roof sections by adding the essential coquets.
* Incoming corner line formed by the inclined intersection of two roof sections.
Monitor and clean
The valleys recover the vegetable waste, maintaining a permanent humidity which degrades the tiles. Watch this sensitive area and clean to facilitate the flow of water.
Maintain ridge and hip
Most often sealed with mortar, the ridge tiles and the hipbone resist aging quite well. However, the seal can split in places, forming as many passages conducive to infiltration. After removing any mosses and lichens, inspect it for cracks. A slight break can be easily plugged with a bead of sealant for exterior masonry (Robson, Sika, etc.). But when the mortar comes off, an identical repair is required (bastard or lime mortar).
Patch a crack on the mortar
A crack on the mortar is easily plugged with putty for exterior waterproofing. A prior brushing of the surface is essential to rid it of mosses and fouling.
Repair a damaged tile
A split or unhooked tile can cause infiltration, which has serious consequences for the frame. Visual verification is not always easy. Some do not hesitate to inspect their roofing with the binoculars; others wait for a good downpour to check the undersides of the tiles (unfinished attic). In short, everything is useful for spotting possible leaks.
Replace a broken tile
Lift the tiles from the top row to remove a broken tile. Slide the new element until you hang the pins on the batten. Then gently lower the top row.
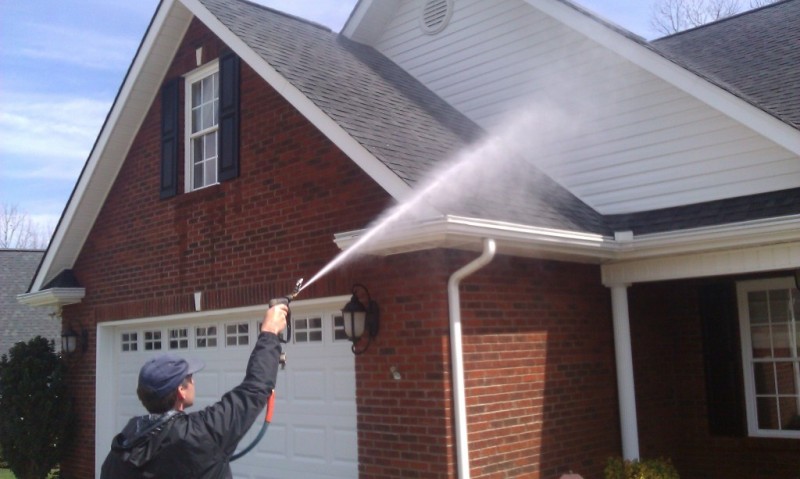
Clean the gutter
Indispensable for evacuating rainwater, the gutter also collects mosses and dead leaves. Annual maintenance is required. Rather than undergoing regular fouling, it is better to reduce the production of waste by preventing climbing plants from colonizing the roof. Remove them with a good pair of gloves. After cleaning, inspect the gutter for a possible crack. A bituminized waterproofing strip forms a very useful dressing to cover and seal a cracked area. You should read the best gutter guards consumer reports to get ideas about the top gutter guards.
From the bottom to the top
To avoid “pushing” the waste towards the downpipe, it is preferable to start from the point of descent and progress towards the other end (use a pair of glove).
Prevent dead leaves from passing
When passing through the downspout, dead leaves can clog it. Install a “strainer”: a sort of sieve which fits into the drain outlet of the gutter.
Repair the interior of the gutter
Repairs inside the gutter with a self-adhesive strip are very discreet. After cleaning, remove the protective sheet from the adhesive side, apply and paste.
Check the drainage
Once the pipes are overhauled, also check the maintenance holes: clear anything that may obstruct them, avoiding letting the waste go down the drain. A ferret connected to the outlet of a high-pressure cleaner makes it possible to clean the evacuation network effectively.
Clean the maintenance holes
Remember to clean the maintenance holes. If you are installing a rainwater collector for your watering, place a piece of wire mesh in the maintenance hole to stop the dead leaves.
Unclog the pipes
If the pipes are clogged, remove the larger one by hand. Then, you have the choice between the ferret or the unblocker of a high-pressure cleaner with its nozzles with lateral “backflows.”
Chimney stack
A sensitive point for infiltration, the chimney stack, is connected with a zinc cladding. In the event of penetration, start with a good cleaning. A defective joint is easily clogged with a little sealant (example: welding between two pieces of zinc). When the connection has an advanced state of degradation, it is better to redo it.
Restore water tightness
In the event of deterioration of the sealing, the zinc can be covered with a self-adhesive aluminum repair sheet reinforced with bitumen. Clean the support for better adhesion.
Roof window
Roof window connection systems have evolved considerably. Each type of cover has its connection kit. A set of profiles in the upper part and on the sides, supplemented by a large flap in the lower part, generally ensures perfect sealing. But the leaves and mosses can accumulate there until the principle is defective. If the size of the chassis does not allow cleaning from the inside, work on the roof remains the only solution. Again, a well-secured roof ladder and a harness are essential!
Clean the junction
Annual cleaning of the junction area of a roof window sometimes prevents infiltration. Slightly malleable, the bib of the lower part must cover and follow the shape of the tiles.